In the realm of home lighting, LED strip lights have emerged as a versatile and innovative solution, offering flexibility, energy efficiency, and creative possibilities.
From accentuating architectural features to providing functional task lighting, LED strips have revolutionized the way we illuminate our living spaces.

In this guide, we delve into the top 8 applications of DC low-voltage LED strip lights within indoor home settings.
Each application is accompanied by detailed insights, installation tips, and answers to frequently asked questions, empowering you to harness the full potential of LED strip lighting to enhance your home environment.
Under-Cabinet Lighting:
- LED Strip Lights: For under-cabinet lighting, opt for high-quality LED strips such as 2835 or 5050 variants, which offer a balance of brightness and energy efficiency. Ensure the LED strips have a high CRI (Color Rendering Index) for accurate color representation, especially important for kitchen tasks.
- How to Use: Install LED strips beneath kitchen cabinets or shelves to provide both functional task lighting and atmospheric illumination. This lighting placement not only enhances visibility for food preparation but also adds an inviting glow to the kitchen space.
- How to Choose: Select the appropriate color temperature based on your preferences and kitchen aesthetics. Warm white (around 3000K) creates a cozy ambiance, while cool white (around 5000K) offers a brighter, more energizing light ideal for task-oriented areas. Consider dimmable options for flexible lighting control, allowing you to adjust the brightness according to different activities and moods.
- Controller and Power: Employ a PWM (Pulse Width Modulation) dimmer for smooth and flicker-free dimming capabilities. Connect the LED strips to a low-voltage DC power supply, ensuring compatibility and safety.
- Installation Steps:
- Measure the length of the area beneath the cabinets or shelves where you intend to install the LED strips.
- Cut the LED strip to the appropriate size using designated cut points, ensuring accuracy.
- Clean the mounting surface thoroughly to remove any dust or grease, promoting optimal adhesion.
- Peel off the adhesive backing of the LED strip and carefully attach it along the underside of the cabinets or shelves, ensuring straight alignment.
- Secure any loose sections with additional adhesive or mounting clips for added stability.
- Connect the LED strip to the PWM dimmer and then to the DC power supply, following the manufacturer’s instructions and ensuring proper polarity.
- FAQ:
- Q: Can LED strips be installed directly on wood cabinets?
- A: Yes, LED strips can be adhered directly to wood surfaces, provided they are clean, dry, and free from any coatings that may inhibit adhesion. Additionally, ensure proper ventilation to prevent heat buildup.
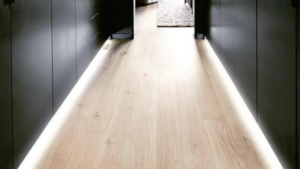
Toe-Kick Lighting:
- LED Strip Lights: Opt for waterproof LED strips, such as 2835 or 5050 variants, specifically designed to withstand moisture and humidity commonly found in kitchen and bathroom environments.
- How to Use: Utilize LED strips to illuminate the floor area beneath cabinets or vanities, enhancing visibility and safety while adding a touch of elegance to the space.
- How to Choose: Consider warm white or cool white LED strips based on your desired ambiance and functional requirements. Alternatively, RGB strips offer color-changing options for added versatility and customization.
- Controller and Power: Implement motion sensors or door switches for seamless, hands-free operation, activating the lights automatically as you approach. Connect the LED strips to a low-voltage DC power supply, ensuring reliability and safety.
- Installation Steps:
- Measure the length of the toe-kick area beneath cabinets or vanities where you intend to install the LED strips.
- Cut the LED strip to the required length using designated cut points, ensuring accuracy.
- Thoroughly clean the bottom edge of the cabinets or vanities to remove any dirt or debris, ensuring optimal adhesion.
- Carefully apply the adhesive-backed LED strips along the underside of the cabinets or vanities, ensuring even placement and alignment.
- Secure any loose sections with additional adhesive or mounting clips to prevent detachment over time.
- Connect the LED strip to the motion sensor or door switch, ensuring proper wiring and polarity alignment to enable automatic activation.
- Connect the motion sensor or door switch to the low-voltage DC power supply, following the manufacturer’s instructions for safe and reliable operation.
- FAQ:
- Q: Can LED strips be installed in areas prone to water splashes, such as behind kitchen sinks?
- A: While waterproof LED strips are designed to withstand moisture, direct exposure to water should be avoided. Install the strips away from areas prone to splashes or use additional waterproofing measures for added protection.

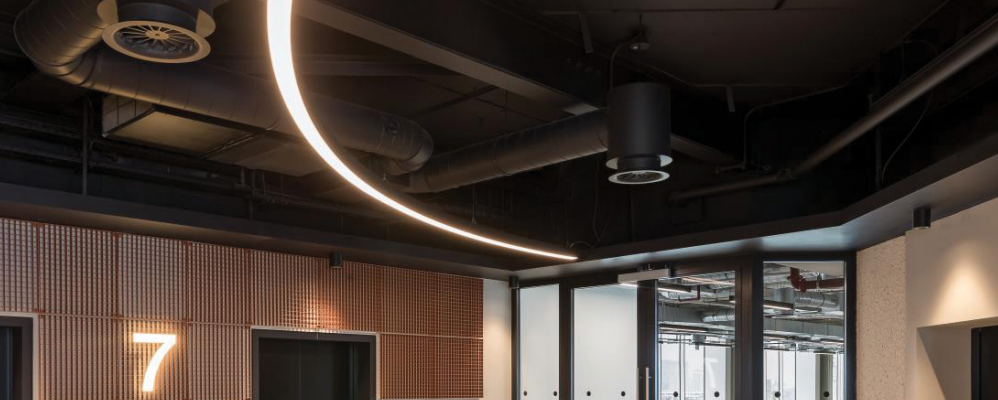
Cove Lighting:
- LED Strip Lights: Opt for high-density LED strips such as 2835, 5050, 3528 variants, known for their uniform illumination and versatility in cove lighting applications.
- How to Use: Enhance the ambiance of your space by mounting LED strips within ceiling coves or recesses, creating a soft, indirect glow that adds depth and visual interest to the room.
- How to Choose: Consider RGB or RGBW LED strips for dynamic color-changing effects, or CCT strips for adjustable white light suited to various moods and activities.
- Controller and Power: Employ RF 2.4G controllers for convenient wireless control over color, brightness, and dynamic lighting effects. Connect the LED strips to a low-voltage DC power supply for safe and efficient operation.
- Aluminum Profile and Linear Lights: Enhance the durability and aesthetics of cove lighting installations by incorporating aluminum profiles and linear lights. These profiles serve as housing for the LED strips, providing protection against damage and facilitating heat dissipation for prolonged lifespan and optimal performance.
- PIR Sensor Integration: Integrate PIR (Passive Infrared) sensors into your cove lighting setup for energy-efficient automation. These sensors detect motion within the vicinity, activating the lights only when occupants are present, thereby reducing energy consumption and enhancing convenience.
- Installation Steps:
- Measure the length and dimensions of the ceiling cove or recess where you plan to install the LED strips.
- Select suitable aluminum profiles and linear lights that complement your design aesthetic and accommodate the chosen LED strips.
- Cut the LED strips to the required length using designated cut points, ensuring precise measurements for a seamless fit within the profiles.
- Attach the LED strips to the interior of the aluminum profiles, ensuring even placement and alignment.
- Secure the assembled profiles along the perimeter of the ceiling cove or recess, using appropriate mounting hardware and adhesive for stability.
- Connect the LED strips to the RF 2.4G controller and then to the low-voltage DC power supply, following the manufacturer’s instructions for proper wiring and polarity.
- Integrate PIR sensors into the lighting circuit, positioning them strategically within the space to maximize coverage and responsiveness.
- FAQ:
- Q: Can LED strips be installed in narrow or irregularly shaped coves?
- A: Yes, flexible LED strips can be easily manipulated to fit narrow or irregularly shaped coves, ensuring uniform illumination throughout the space. Alternatively, consider using cuttable linear lights that offer greater flexibility in accommodating various configurations.
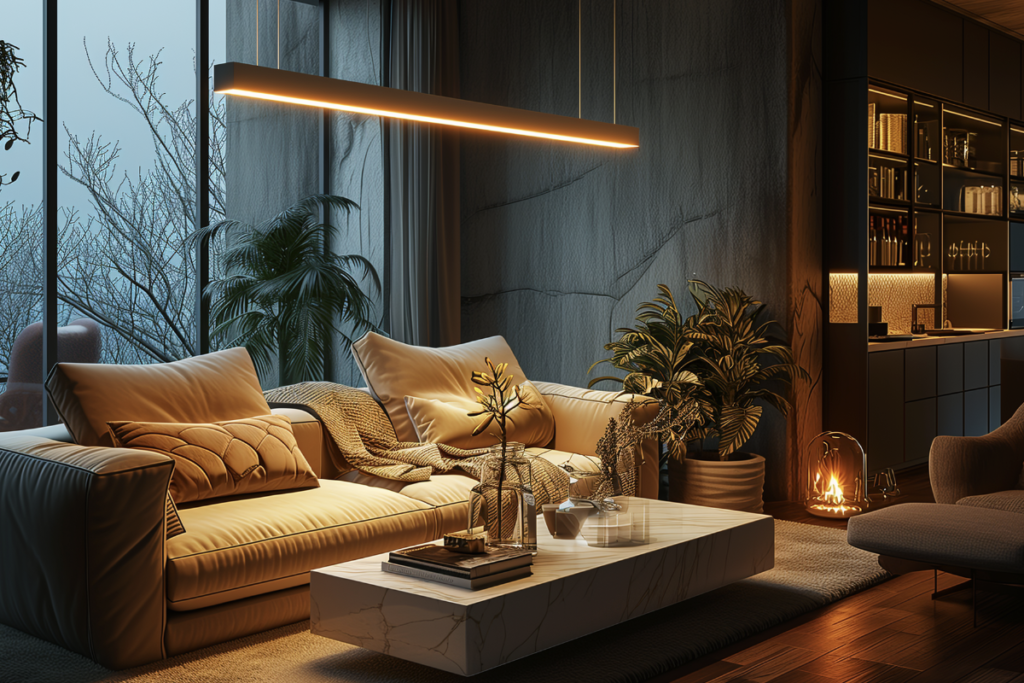
Accent Lighting:
- LED Strip Lights: Opt for high-brightness COB (Chip-on-Board), 5050 RGB/RGBW/RGBCCT LED strips, renowned for their ability to produce vibrant colors and eye-catching illumination ideal for accent lighting.
- How to Use: Employ LED strips to accentuate architectural features, artwork, or decorative elements within your living space, creating focal points and adding visual interest.
- How to Choose: Consider RGBIC (Individually Addressable RGB) LED strips for dynamic lighting effects, allowing each LED to emit a different color independently. Alternatively, high-CRI (Color Rendering Index) LED strips ensure accurate color representation, vital for showcasing artwork or decorative pieces.
- Controller and Power: Utilize a DMX (Digital Multiplex) controller for advanced lighting control, enabling precise color mixing and sequencing for captivating visual displays. Connect the LED strips to a low-voltage DC power supply to ensure safe and efficient operation.
- Installation Steps:
- Identify the areas or objects you wish to highlight with accent lighting, such as architectural details, sculptures, or artwork.
- Measure the length of each section and cut the LED strips to size at designated cut points, ensuring precise customization.
- Clean the surface surrounding the area or object to remove any dust or debris, promoting optimal adhesion of the LED strips.
- Carefully apply the adhesive-backed LED strips along the designated areas or objects, ensuring even placement and alignment for uniform illumination.
- Secure any loose sections with additional adhesive or mounting clips to prevent detachment and ensure long-lasting stability.
- Connect the LED strips to the DMX controller, following the manufacturer’s instructions for proper wiring and configuration to enable seamless integration.
- Connect the DMX controller to the low-voltage DC power supply, ensuring correct polarity and secure connections to facilitate reliable performance.
- FAQ:
- Q: Can LED strips be installed to highlight textured walls or surfaces?
- A: Yes, LED strips can be utilized to accentuate textured walls or surfaces, creating intriguing visual effects and enhancing the overall aesthetic appeal of the space. Ensure proper surface preparation and adhesive application for optimal adhesion and longevity of the LED strips.

Home Theater Lighting:
- LED Strip Lights: Choose high-quality LED strips suitable for home theater environments, such as RGB or RGBIC variants, known for their ability to create immersive lighting effects that complement the cinematic experience.
- How to Use: Install LED strips strategically around the TV screen or behind furniture to enhance the ambiance of your home theater, creating dynamic lighting scenes synchronized with movie playback.
- How to Choose: Opt for RGBIC LED strips equipped with individually addressable LEDs, allowing for intricate lighting patterns and color variations. Alternatively, select high-density LED strips for maximum brightness and uniform illumination.
- Controller and Power: Utilize smart controllers compatible with HDMI or Tuya WiFi LED strip kits, offering seamless integration with your home theater setup. These controllers allow for easy synchronization of lighting effects with movie content and convenient control via smartphone apps.
- Installation Steps:
- Measure the perimeter of the TV screen or furniture where you intend to install the LED strips, ensuring precise placement for optimal visual impact.
- Cut the LED strips to the required length using designated cut points, ensuring accurate customization to fit the desired areas.
- Clean the surface around the TV screen or furniture to remove any dust or debris, ensuring proper adhesion of the LED strips.
- Carefully apply the adhesive-backed LED strips along the edges of the TV screen or furniture, ensuring even placement and alignment for uniform lighting distribution.
- Connect the LED strips to the HDMI or Tuya WiFi LED strip kit controller, following the manufacturer’s instructions for proper wiring and configuration.
- Configure the controller settings to synchronize lighting effects with movie playback, adjusting brightness, color, and effects to suit your preferences.
- Connect the controller to the power source, ensuring secure connections and proper voltage compatibility for reliable operation.
- FAQ:
- Q: Can LED strips be synchronized with specific movie scenes or sound effects?
- A: Yes, with HDMI or Tuya WiFi LED strip kits, LED strips can be synchronized with movie content, allowing for immersive lighting effects that enhance the viewing experience. Utilize compatible apps or software to customize lighting scenes and synchronize them with specific movie scenes or sound effects for an immersive cinematic experience.

Headboard Lighting:
- LED Strip Lights: Opt for single white or CCT (Correlated Color Temperature) LED strip lights, offering adjustable white light suitable for reading or creating a relaxing ambiance in the bedroom.
- How to Use: Install LED strips behind the headboard to provide focused illumination for bedtime reading or ambient lighting for a cozy atmosphere.
- How to Choose: Select LED strips with touch dimming capabilities or compatible with push board or PIR sensor switches for convenient control without the need for additional wiring. Ensure the LED strips are compatible with voice control systems for seamless integration into smart home setups.
- Controller and Power: Utilize a smart control system compatible with voice assistants such as Amazon Alexa or Google Assistant for hands-free control of the headboard lighting. Connect the LED strips to the smart control system and a low-voltage DC power supply for efficient and reliable operation.
- Installation Steps:
- Measure the width of the headboard and cut the LED strip to size at designated cut points, ensuring proper coverage along the length of the headboard.
- Clean the surface behind the headboard to remove any dust or debris, promoting optimal adhesion of the LED strips.
- Apply the adhesive-backed LED strips along the top edge or behind the headboard, ensuring even placement and alignment for uniform illumination.
- Connect the LED strips to the touch dimmer, push board, or PIR sensor switch, ensuring proper wiring and compatibility with the chosen control method.
- Configure the smart control system to recognize the LED strips and enable voice control commands for adjusting brightness or color temperature as desired.
- Connect the smart control system to the low-voltage DC power supply, ensuring secure connections and proper voltage compatibility for safe and reliable operation.
- FAQ:
- Q: Can LED strips be dimmed or adjusted using voice commands?
- A: Yes, LED strips equipped with touch dimming capabilities or compatible with smart control systems can be adjusted using voice commands through voice assistants such as Amazon Alexa or Google Assistant. Simply issue voice commands to increase or decrease brightness or adjust color temperature for customized lighting experiences.
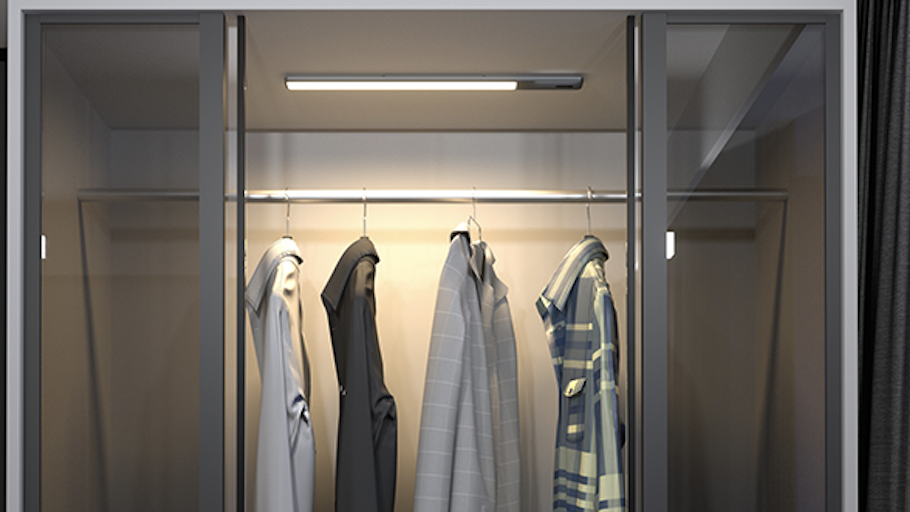
Wardrobe or Closet Lighting:
- LED Strip Lights: Opt for 2216, 2835, 2110 and COB ultra-thin LED strip lights, specifically designed for narrow spaces such as wardrobes or closets. These slim profiles ensure seamless integration and uniform illumination without adding bulk to the interior.
- How to Use: Illuminate the interior of wardrobes or closets with LED strip lights to enhance visibility and facilitate efficient organization of clothing and accessories. The soft, diffused light creates a welcoming atmosphere while making it easier to locate items.
- How to Choose: Select LED strip lights with high brightness and a neutral white color temperature (around 2700K to 4000K) to ensure optimal visibility without causing color distortion. Ultra-thin profiles allow for discreet installation, minimizing intrusion into storage space.
- Controller and Power: Incorporate touch, hand wave, or PIR (Passive Infrared) sensors for convenient activation of the lighting system without the need for physical switches. Alternatively, integrate a door function switch that automatically turns on the lights when the wardrobe or closet door is opened.
- LED Aluminum Profile and Cabinet Driver: Enhance the durability and aesthetics of the lighting installation by utilizing LED aluminum profiles and a cabinet driver. The aluminum profile serves as a protective housing for the LED strips, while the cabinet driver ensures stable and efficient power distribution.
- Installation Steps:
- Measure the interior dimensions of the wardrobe or closet to determine the required length of LED strip lights.
- Choose ultra-thin LED strip lights that fit seamlessly within the available space and offer sufficient brightness for visibility.
- Install LED aluminum profiles along the top or sides of the wardrobe or closet interior, ensuring they are securely mounted and aligned.
- Affix the ultra-thin LED strip lights into the aluminum profiles, following the manufacturer’s instructions for proper installation.
- Connect the LED strip lights to the cabinet driver, ensuring all connections are secure and properly insulated.
- Integrate touch, hand wave, PIR sensors, or a door function switch into the lighting circuit, positioning them strategically for easy access and reliable operation.
- Test the lighting system to ensure functionality and adjust settings as needed for optimal performance.
- FAQ:
- Q: Can ultra-thin LED strip lights be cut to fit custom lengths?
- A: Yes, most ultra-thin LED strip lights are designed for easy cutting at designated cut points, allowing for precise customization to fit the dimensions of the wardrobe or closet interior. Be sure to follow the manufacturer’s guidelines for cutting and reconnection to avoid damage to the LED strips.
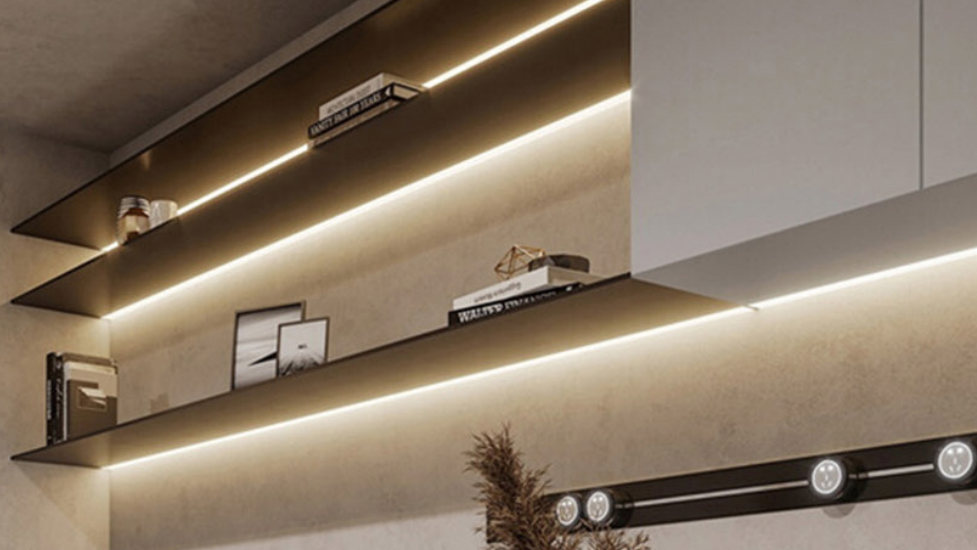
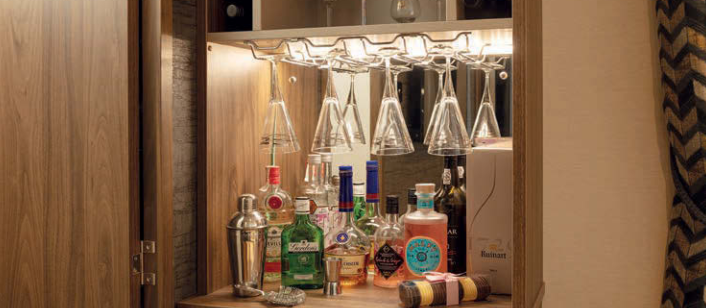
Shelf Lighting:
- LED Strip Lights: Opt for versatile LED linear lights or strip lights suitable for both hanging and embedding within aluminum profiles. These lighting solutions offer flexibility in design and installation, allowing for seamless integration into shelving units while providing uniform illumination.
- How to Use: Illuminate shelves to showcase items or provide task lighting using LED linear lights or strip lights embedded within aluminum profiles. This enhances the aesthetic appeal of displayed objects while offering practical functionality.
- How to Choose: Select LED linear lights or strip lights with appropriate brightness levels and color temperatures to complement the shelved items and overall room ambiance. Consider dimmable options for adjustable lighting intensity.
- Controller and Power: Utilize dimmer switches or smart controllers for convenient brightness control and customization. Connect the LED lights to a low-voltage power supply for efficient and safe operation.
- Hanging and Embedding Aluminum Profile or Linear Light: Incorporate aluminum profiles designed for both hanging and embedding applications. These profiles provide structural support and a sleek finish, enhancing the aesthetics of the shelving unit while protecting the LED lights.
- Installation Steps:
- Measure the dimensions of the shelves and determine the desired placement of the LED lights.
- Choose aluminum profiles suitable for hanging or embedding, ensuring compatibility with the selected LED lights.
- Install the aluminum profiles along the edges or undersides of the shelves, securely mounting them using appropriate hardware.
- Embed the LED linear lights or strip lights within the aluminum profiles, ensuring even placement and alignment.
- Connect the LED lights to the power supply, following the manufacturer’s instructions and ensuring proper polarity.
- Install dimmer switches or smart controllers as desired, providing convenient control over the lighting intensity and ambiance.
- Test the lighting system to ensure proper functionality and adjust settings as needed for optimal illumination.
- FAQ:
- Q: Can LED strip lights be installed in glass display cabinets?
- A: Yes, LED strip lights can be installed in glass display cabinets by embedding them within aluminum profiles or mounting them along the edges of the shelves. Ensure proper adhesion and sealing to prevent damage from moisture or heat.
Conclusion:
In conclusion, the myriad applications of DC low-voltage LED strip lights offer boundless opportunities to elevate the ambiance and functionality of indoor home spaces.
Whether illuminating under-cabinets in the kitchen, accentuating architectural details in the living room, or enhancing the tranquility of the bedroom, LED strips provide a customizable and energy-efficient lighting solution.
By leveraging the versatility of LED technology, coupled with advanced controllers, sensors, and installation accessories, homeowners can create personalized lighting schemes that reflect their unique style and enhance everyday living.
Embrace the possibilities of LED strip lighting to transform your home into a haven of comfort, functionality, and visual delight.